Are you tired of rummaging through a cluttered makeup drawer every morning? Do you find it challenging to locate the perfect lipstick shade or the right eyeshadow palette? Keeping your makeup collection neat and organized can seem like a daunting task, but it doesn’t have to be. With a few simple tips and tricks, you can transform your messy makeup drawer into an organized oasis. In this article, we’ll explore how to organize makeup in a drawer, step by step.

Why Organizing Your Makeup Drawer is Important
Before we dive into the how-to section, let’s discuss why organizing your makeup drawer is essential. Here are some reasons why you should take the time to declutter and arrange your makeup collection:
- Saves time: When you have a tidy and organized makeup drawer, you can easily find what you’re looking for, saving you precious time in the morning rush.
- Reduces stress: A cluttered space can increase stress and anxiety levels. By decluttering your makeup drawer, you’ll create a peaceful and relaxing environment.
- Increases hygiene: An unorganized makeup drawer can harbor bacteria and germs, leading to skin irritation and breakouts. By keeping your makeup products clean and organized, you’ll minimize the risk of infection.
How to Organize Makeup in a Drawer
Organizing your makeup drawer may seem like a daunting task, but it’s a simple process that anyone can accomplish. Follow these steps to get started:
1. Empty the drawer
Emptying out your makeup drawer is the first and most important step to getting organized. It may seem like a daunting task, but it’s essential to start with a clean slate. Not only does emptying out the drawer allow you to see everything you have, but it also gives you the opportunity to assess each item and decide what you really need and what you can let go of.
To begin, find a clean and spacious surface to lay out all of your makeup products. This could be a table, a countertop, or even a bed. Make sure the surface is clean and free of clutter to avoid any cross-contamination or mess.
2. Sort by category
Once you’ve emptied out your makeup drawer and assessed each item, it’s time to start categorizing. Sorting your makeup products into categories such as foundation, blush, eyeshadow, and lipstick is a crucial step in the organizing process. It not only makes it easier to decide how to organize your drawer, but it also ensures that you’ll be able to find what you need quickly and easily.
Start by grouping similar items together. Foundations should be placed with other foundations, blushes with blushes, and so on. As you sort through your products, you may find that some items can fit into multiple categories. For example, a tinted moisturizer may be categorized as both a foundation and a moisturizer. In these cases, choose the category that makes the most sense to you and your routine.
Sorting your makeup products into categories also allows you to see which items you have duplicates of. It’s easy to forget about a product you haven’t used in a while and accidentally buy a duplicate, but categorizing your products will help you avoid this.
Once you’ve sorted everything into categories, take a moment to admire your handiwork. Seeing all of your makeup products grouped together in an organized way can be very satisfying, and it will make the next step much easier.
Read also Makeup for Your Skin Tone: Unleash Your Natural Beauty with the Perfect Shades
3. Declutter
After sorting your makeup products into categories, it’s time to take a critical look at each item and decide what to keep and what to let go of. This can be a tough process, but it’s essential to ensure that you’re only holding onto products that you actually use and love.
Start by checking the expiration date on each item. Makeup products have a shelf life, and using expired products can lead to irritation, infection, and other issues. If a product has expired, it’s time to let it go.
Next, consider how often you use each item. If you haven’t used a product in several months, it’s likely that you won’t use it again anytime soon. Consider donating these products to a friend or family member who may enjoy them, or even a local women’s shelter or charity organization.
As you go through your products, take the opportunity to really consider how they fit into your routine. Do you have multiple shades of the same product that you never use? Are there items that you keep around “just in case,” but never actually reach for? These items are likely taking up valuable space in your makeup drawer and should be let go of.
Remember that keeping your makeup collection streamlined and functional will make it much easier to get ready in the morning. By letting go of products that no longer serve a purpose in your routine, you’ll be left with a collection that you truly love and use.
4. Clean the drawer
Before you begin the actual process of organizing your makeup drawer, it’s important to prepare the space. Start by wiping down the drawer with a damp cloth to remove any dirt, dust, or debris that may have accumulated over time. This step will not only help to make the space cleaner and more hygienic, but it will also make it easier to see what you’re working with.
Dirt and dust can accumulate quickly in makeup drawers, especially if you keep your products in their original packaging. Over time, this can create a layer of grime that’s unsightly and even potentially harmful to your health. By taking the time to wipe down your drawer before you start organizing, you’ll be able to create a clean, fresh slate for your makeup products.
To wipe down the drawer, use a damp cloth or paper towel and make sure to get into all the corners and crevices. You may also want to consider using a gentle cleaning solution if your drawer is particularly dirty. Just make sure to avoid any harsh chemicals or abrasive cleaners, as these can damage the surfaces of your makeup products.
Once your drawer is clean and dry, you can move on to the actual organizing process. By starting with a clean, clutter-free space, you’ll be able to create an organized and functional makeup drawer that you’ll love using every day.
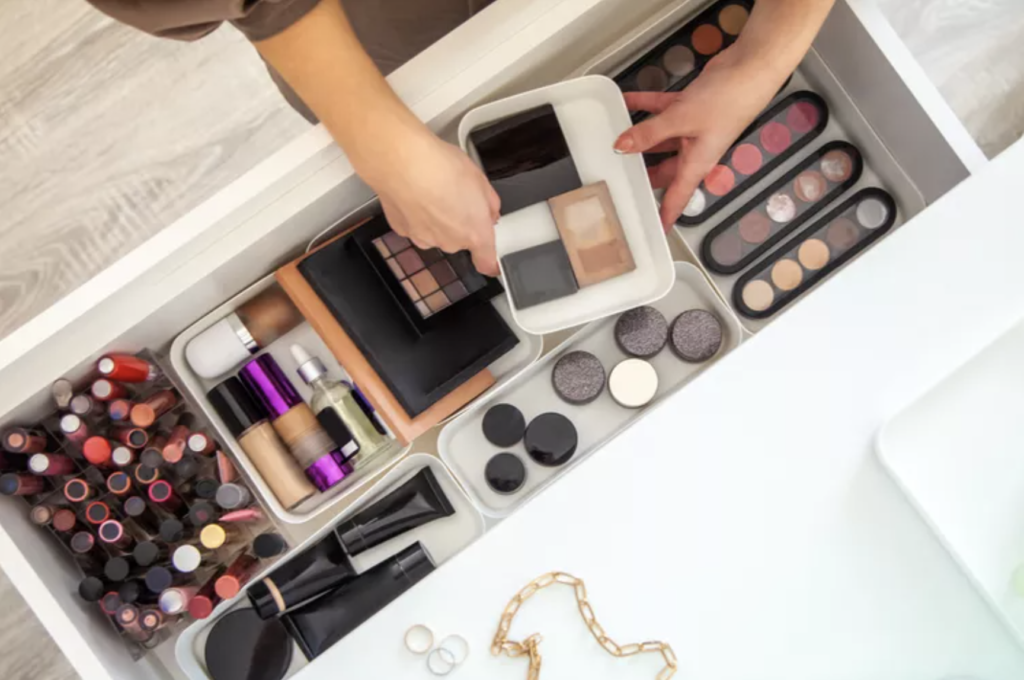
5. Choose your organizers
After sorting through your makeup collection and preparing your drawer, it’s time to start thinking about how you want to organize your products. While there are many ways to approach this task, one of the easiest and most effective methods is to use makeup organizers.
There are countless different types of makeup organizers available on the market, from simple acrylic trays to more complex dividers and compartments. When choosing an organizer, it’s important to consider both the size of your drawer and the size and shape of your makeup products.
For example, if you have a large collection of lipsticks, you may want to choose an organizer with narrow compartments that can hold them all in an upright position. On the other hand, if you have a lot of eyeshadow palettes, you may want to look for an organizer with wider compartments that can accommodate their larger size.
It’s also important to consider the material and quality of the organizers you choose. While there are many affordable options available, it’s worth investing in organizers that are made from durable materials and can withstand regular use.
Ultimately, the key is to choose organizers that suit your personal preferences and makeup collection. By taking the time to select the right organizers, you’ll be able to create a system that’s both functional and aesthetically pleasing, making it easier to find and use your favorite products every day.
6. Organize your products
After preparing your drawer and selecting the appropriate organizers, it’s time to start organizing your makeup products. This is where the real fun begins!
First, use the organizers you’ve chosen to separate your makeup products into categories such as foundation, blush, eyeshadow, and lipstick. This step will make it easier for you to decide how to organize your drawer and ensure that similar products are stored together.
Once you’ve sorted your products into categories, you can begin arranging them in a way that makes sense to you. There are many different ways to do this, depending on your personal preferences and the size and shape of your makeup collection.
One popular method is to arrange your products by color. This creates a visually appealing and cohesive look and makes it easy to find products that match or complement each other. Another option is to arrange your products by size, with larger items placed in the back and smaller items in the front. This helps maximize the use of your space and ensures that everything is easily visible.
You can also arrange your products by frequency of use. Place your most frequently used items in a spot where you can easily access them, and store less frequently used items in the back or on a higher shelf. This will make your daily makeup routine more efficient and save you time.
Ultimately, the key to organizing your makeup drawer is to find a system that works for you. Don’t be afraid to experiment and try different methods until you find the one that best suits your needs. With a little time and effort, you can transform your cluttered and chaotic makeup drawer into a well-organized and functional space that makes your daily routine a breeze.
7. Label the organizers
After you’ve arranged your makeup products into categories and placed them in the appropriate organizers, it’s a good idea to label each organizer. Labeling the organizers will help you easily identify where each product is located, especially if you have a large makeup collection.
Labeling can be done in a variety of ways, depending on the type of organizer you’ve chosen. For example, if you’re using acrylic trays, you can use a label maker or write directly on the tray with a permanent marker. Alternatively, if you’re using drawer dividers, you can attach labels to each divider with adhesive tape or removable stickers.
When creating your labels, make sure to include the product category, such as “lipstick,” “eyeshadow,” or “blush.” You can also add additional information, such as the brand or color, to make it even easier to find what you’re looking for.
Labeling your organizers not only helps you find your makeup products quickly but also helps maintain the organization of your drawer over time. It serves as a reminder of where each product belongs and encourages you to put things back in their designated spot after use. This will ensure that your makeup drawer stays neat and tidy, saving you time and frustration in the long run.
Tips for Maintaining an Organized Makeup Drawer
Organizing your makeup drawer is only half the battle. Maintaining it is equally important. Here are some tips for keeping your makeup drawer tidy and organized:
- Clean your makeup products regularly to prevent them from accumulating dirt and bacteria.
- Stick to a routine and put your makeup away after each use.
- Regularly assess your collection and get rid of products that are expired or no longer used.
- Keep your organizers clean by wiping them down regularly.
- Resist the temptation to overstuff your drawer, as it will only lead to clutter.
FAQs about how to organize makeup in a drawer
1. How often should I organize my makeup drawer?
It’s recommended to organize your makeup drawer every three to six months, depending on how frequently you use your products.
2. Can I use any organizers to organize my makeup drawer?
Yes, you can use any organizers that suit your makeup collection and drawer size. Choose organizers that complement your collection and make it easy to find what you need.
3. How do I keep my makeup drawer clean?
To keep your makeup drawer clean, wipe it down with a damp cloth regularly. You should also clean your makeup products to prevent them from accumulating dirt and bacteria.
4. How do I declutter my makeup collection?
To declutter your makeup collection, take a critical look at each item and ask yourself if you really need it. If it’s expired or you haven’t used it in a while, consider throwing it away or donating it.
5. Can I organize my makeup without using organizers?
While using organizers can make it easier to keep your makeup collection organized, it’s possible to do so without them. You can use small boxes or trays to separate your products by category.
6. How can I make my makeup drawer look pretty?
You can make your makeup drawer look pretty by using organizers in fun and vibrant colors. You can also add a pretty liner to the bottom of the drawer to add a pop of color.
Conclusion
Organizing your makeup drawer may seem like a daunting task, but it’s worth the effort. Not only will it save you time and reduce stress, but it will also increase your hygiene and make your morning routine more enjoyable. Follow the simple steps on how to organize makeup in a drawer outlined in this article to organize your makeup drawer and maintain it for a clutter-free and relaxing space.